Discharge Instructions: Using Sterile Glove Technique
Your health care provider wants you to change a dressing or do other care using sterile glove technique. Sterile means germ-free. Sterile glove technique is a way to protect you from infection. You were shown sterile technique in the hospital. The information below will help you remember those steps when you are at home.
General guidelines
Wear a mask if you are told to use one.
Wash your hands with soap and clean, running water or use an alcohol-based hand sanitizer before and after any sterile procedure.
Prepare a clean work area each time you use this technique. Don’t work in the bathroom. It has too many germs.
When you handle supplies, be sure to keep them sterile and dry.
If you are handling a packaged sterile product and not wearing gloves, only touch the outside wrapper. Don’t touch the sterile supplies when not wearing gloves.
Don’t reach over the sterile supplies while you are performing your care.
Have all the other items you need for the procedure ready before you begin to put on your sterile gloves.
Step 1. Prepare a clean work area
Take pets and children out of your work area.
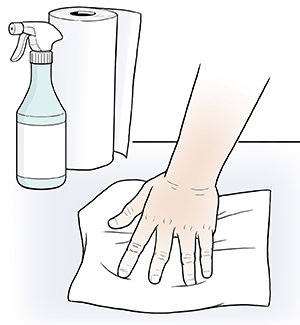
Clean washable surfaces with soap and water, and dry with a paper towel.
Wipe surfaces that are not washable (such as fabric or wood) so that they are free of dust. Spread a clean cloth or paper towel over your work surface.
If you need to cough or sneeze, cover your work surface and supplies. Move away from them.
Step 2. Open the outer packaging
Open the outer packaging. (The gloves will be inside another inner wrapper.)
Wash your hands.
Open the inner wrapper.
Touching only the outside of the wrapper, put the wrapped sterile gloves on your clean, dry work surface.
Don’t put the wrapped gloves on the outer packaging.
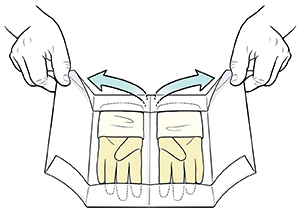
Touching only the edges, open the inner wrapper so that you can see both gloves.
Step 3. Wash your hands
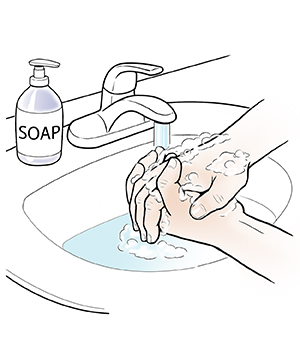
Turn on the water.
Wet your hands and wrists.
Use liquid soap from a pump dispenser. Work up a lather.
Scrub your hands well for at least 20 seconds. This is about the time it takes to sing the Happy Birthday song twice.
Rinse your hands with your fingers pointing down toward the drain.
Dry your hands with a paper towel. Use this towel to turn off the faucet.
After you have washed your hands, don’t touch anything but your supplies. You must wash your hands again if you touch anything else, such as furniture or your clothes.
Step 4. Put on the first glove
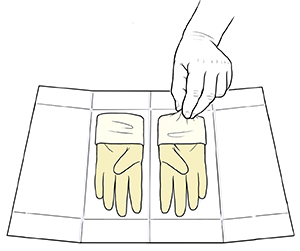
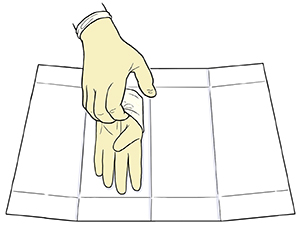
Take the hand you write with and grasp the glove for your other hand at the folded edge of the cuff.
Pick up the glove by the folded edge.
Put your hand inside the glove. Keep your hand flat and your thumb tucked in.
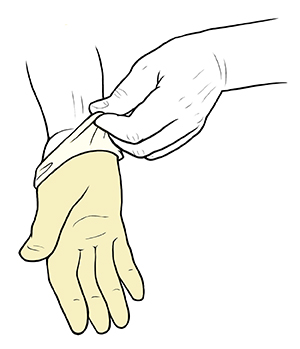
Pull the glove on.
Be careful not to touch the outside of the glove. Touch only the part of the glove that will be next to your skin.
Leave the cuff on the glove folded.
Step 5. Put on the second glove
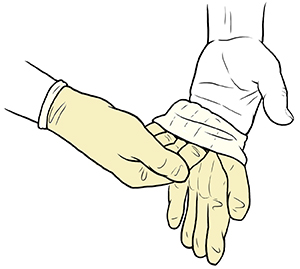
Now, slip the fingers of your gloved hand into the folded cuff of the other glove.
Lift up the second glove.
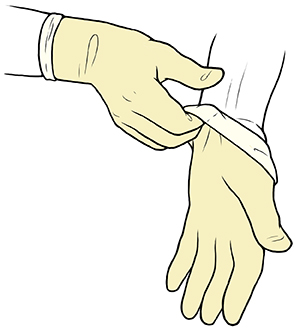
Put the glove over your fingers. The hand that you are putting the glove on should stay flat. Keep the gloved thumb up and back to keep from touching your bare palm or wrist.
Pull the glove over your hand.
Adjust each glove to get a snug fit. Adjust the fingers after both hands are gloved.
Reach under the cuffed part to pull up or adjust.
Step 6. After the gloves are on
Keep your hands in front of you and above your waist. Don’t touch anything outside the sterile field.
If you break sterile procedure, remove the gloves, get a new package, and start again.
When you finish the procedure, dispose of the gloves and the other materials you used as instructed by your health care provider.
Follow-up
Follow up with your health care provider, or as advised.
